Saturday, April 22, 2006

Following in Maggie's footsteps


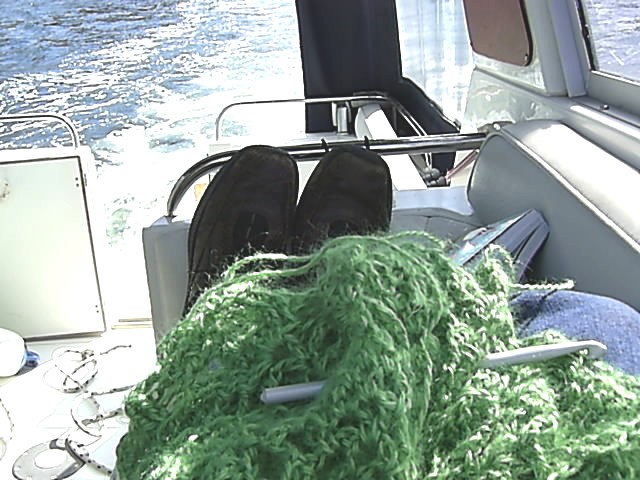
The feet and I made it to the workroom this evening rather than enjoying the pleasures of Dr Who. I still have to hide behind the sofa but hiding in the workroom seemed like a more sensible bet.

Looking at the feet made me think about the situation between Maggie and myself. We are virtual strangers integrally linked by this project. I wanted the feet to be together but separate so I left a space between and enough silk to border them on all four sides. This was going to give me the opportunity to use the clip-together frame which was a must have but is seldom used. Spot the paper mache warriors in the background still awaiting their missing ears and noses.

I like Maggie's title of Dream Walking. I dream memorably and vividly every night but have little or no control over them. I like to work that way too, just letting things happen.

I was guided by Maggie's colour palette of red and yellow, adding blue to made brown but allowing the colours to mix themselves on the fabric.

I love the smell of silk paint in my workroom. Reminds me of the days when I used to get off my bum every now and then and actually do something personally creative. This is a good jumpstart. Who knows where it will lead us.

Best feet forward


Maggie's feet strolled into my shop this afternoon. How exciting! Maggie is an internet bud and together we are having a little collaborative experiment. Check out Maggie's blog for the story so far.

Maggie sent me both sets of feet, the original idea being that we keep (and add to) a set each. As I have carte blanche to alter them as I choose (thanks Maggie!) I decided I rather like them as a pair.....or a pair of pairs, if you see what I mean.

More later...

Thistle do


I've been having a practice adding some petals to the children's faces. Being the national flower of Scotland, the thistle is a very popular choice. They had good success fringing and folding pieces of paper to represent frilly thistle down and I reckoned the same thing would work in fabric, which it does. There are however two things I had reckoned without.

I assumed that the children knew what a thistle actually looked like. Never a good idea to assume anything. All the other flowers we tried had petals going right round. Ergo, these frilly thistle things went right round. Right? Wrong. Had to explain it was frilly thistle hair only teamed with an attractive green Santa Claus beard at the other end.

Secondly, I assumed that six year olds would appreciate my acerbic, sarcastic wit. 'Wha dare meddle wi' me! I shouted at them. 30 pairs of frightened eyes looked back at me. This is the national motto of Scotland as we are all jaggy little thistles up here and you mess with us at your peril. Explained this to the started troops who still looked a bit dubious. Will have to remember to tone down the dramatic asides.

One problem is rather been exercising me. How to cut out and reattach to the main frame the children's faces once stitched. It struck me that some of the original background fabric must remain visible. Easier to disguise if it was green that if it was white so I printed out the little darlings on a green background. Crumbs, did that yomp through the ink! I'm printing onto Miracle Fabric Sheets and 14 little miracles used a whole cartridge of yellow ink. It does solve the green Santa Claus beard problem rather nicely. Those being thistles can be cut out plus beard thus incurring minimum meddling. Easy peasy lemon squeezy.

Thursday, April 20, 2006

Paper Roses

Lovely day at flower school today. Only school I've ever been in where they thanked God for sending me (in prayers after lesson). Usually it's thank God she's away! Children grasped the paper flower concept well and turned themselves into roses and thistles, chrysanthemum and pansies. One little boy informed me that he was going to design his own flower - and why not!


I had cropped the children's photographs very tightly to make them look like the centre of flowers and they found it difficult to recognise themselves without hair. That's not me declared one little shoot. I'm not bald!

They soon had the hang of it although they begged reassurance that this was only a practice. I thought they did pretty well.

A new girl to this school was crying, so much fuss was made over her and her flower was held up by the teach for everyone to see how lovely it was. She was smiling by the end of the lesson. Good school.

Back on Tuesday for introduction to needlework - with the help of God.

Monday, April 17, 2006

Flower Power

Ever wished you were a flower? It's no better, believe me. In the words of the Average White Band...there's always someone waiting looking over your shoulder, just when you think you've got it made and everything is lemonade. Good positive message for the kiddiewinkies, eh? Perhaps I'll leave them to learn that one for themselves in later life.

I've decided these will be my four 3D paper flower examples. Let's hope no one wants to a hyacinth. The insects, I'm still working on. Not nearly menacing enough. Scroll down and you'll see the little seed pods waiting for their petals. Thursday is unfurling day. Watch this space.


Wednesday, April 12, 2006

To put you in the picture


I start at flower school once Easter is over and have been preparing today. Suggested the school's photographer take pics of the kids with different expressions and looking in different directions. This has worked a treat with lots of dialogue going on between the flowers. It suggested a great story telling project based on what one flower is saying to another or at the very least, a caption contest.

I freshened up my rusty computer design skills and cut out the flower heads with Corel Draw freehand tool. Quite a job where there are thirty of them! Need to mask them off a bit more with the circle tool to get rid of a few sharp corners here and there.

Next job is to print them onto paper and let the kids have a go at arranging their paper petals. Then we print onto fabric and stitch for real. I commissioned a differently abled carpentry workshop to make me 31 frames designed to fit the fabric sheets. For this they charged me only £20! Good job. Part of the project was for two of the woodworkers to take a train ride and deliver the frames to me. They managed fine and I couldn't help a wry smile at what was written on the bottom of the box.

'This is the bottom of the box. If you're reading this, the box is upside down or you need a hobby'. Uhuh....

I was indulging my other hobby this afternoon and having a bash a making Thai fish cakes. Haven't eaten them yet. Will let you know!

Tuesday, April 04, 2006

Lost at sea

I became spectacularly lost on the way to my see through sea scapes workshop today. I have a satellite navigation system in the van but the trouble is I don't believe it. A bit like the crochet pattern that obviously had a mistake in it when it was written. It couldn't possibly be anything I had done wrong.

Turn left says the sat nav. No, I argue, you're lying- and turn the other way. After a few miles of this I did not have a clue where I was and had to obey instructions which were of course perfectly correct and got me there in no time. Anyone else suffer from this debilitating, know- it- all mentality?

The workshop went well when I finally arrived. We had so much fabric to audition the floor was the only available space. Had to take a shot of all the lovely tins people brought especially to prop up there frames. It included diet food for dogs. I didn't realise there was such a product!

Sadly one of my machine was sick and will have to go to hospital. Its zigzag knob zigs no longer and is looking decidedly zaggy. Hoping my dearly beloved can fix it. I know this is naughty and that you are not supposed to poke about in your machine's innards without having spent seven years at med school but we like to live life on the edge.

Enjoy the rest of the pcitures.


Sunday, April 02, 2006

Frame up


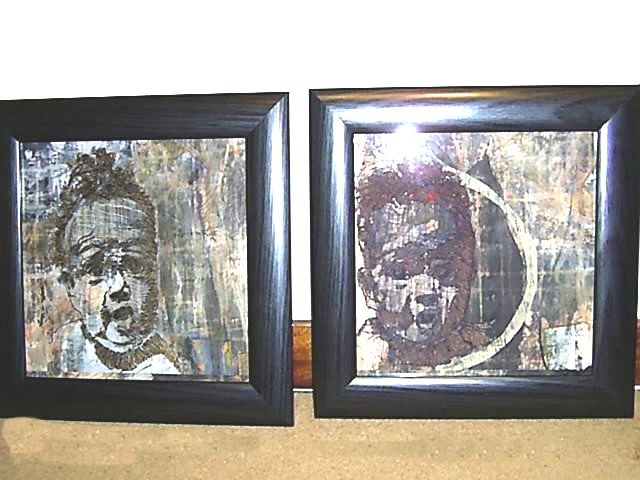
My pieces for the exhibition turned into a saga because I misread the hand in date and didn't have time to have them properly framed. These were the only two ready mades that fitted them -approximately. They needed a bit of patching down the bottom which you'll see if you look closely. On the whole I like them as a pair though and think they have an affinity with one another. They are heading off to Paisley museum in the morning where I hope they'll be hung together.

Friday, March 31, 2006

...and it's hey for the tartan....


I've been adding the finishing touches to the kids life sized collage puppets ready for the forthcoming display. Most just needed a few tears patched up or a few crinkles ironed flat. Two boys had started to make a kiltie figure but lost heart very quickly. I decided I would have some fun finishing him off and turning him into the stereotypical Scottish male.

Do you think I'm dating the wrong kind of guys?

Wednesday, March 29, 2006

Serendipity

Talking about happy accidents, I was packing for the sea scapes workshop today and digging out some bits of decorated paper for the ladies to play with. A couple of bits took my fancy. These baby's heads have been looking for a home for a looooong time now and I have an exhibition looming. I'm going to have them framed which means I'll miss the hand in date. Have asked for special dispensation but even if this exhibition is a no-go, there's another one just around the corner.




I would be interested to know what these images make you thing/feel if you have time to leave a comment. Thanks.

Wednesday, March 15, 2006

See through sea scapes


My next workshop is not for a few weeks. It's called see through sea scapes and is for adults this time. I ask people to bring a couple of tins of soup which is always fun. Disappointingly we don't paint with the soup. The tins are to make our frames stand up. We paint with silk paint on sheer fabric, letting the water dribble down it causing trees to form as if my magic.

Next we collage together some unlikely looking background fabrics like the orange sky and dirty dishcloth sea you see here. Place a magic sheer on top of these, and voila, a stormy sea scape.

I haven't done this technique for many a long year and was having a practice the other day. In theory, any old stripes painted in any old random fashion will work as long as you don't combine too many colours. That's the joy of this workshop. We are always being bombarded with inspiration, told we must have a source, must have a design. This technique is about having the grace to accept happy accidents and the savvy to recognise one when it bites you in the leg.


I wasn't thrilled with the happy accident I was given while practicing but if you mask it off, it has possibilities.

The other part of this workshop is how to make fabric collage without having to paint anything. I collect cheap and cheerful nylon curtain and it layers up very nicely into little bondaweb sea scapes like the boat on the beach you see here.

This particular workshop is for the embroiderers' guild and the whole point is to give them something you can stitch into. I've added a couple of trees to give you can idea what a finished product might look like.


a stormy sea scape
recognising a happy accident when it happens


a nylon curtain sea scape


and finally, some embroidery.